
I have recently purchased a new Razer Blade 15 (2020) – Base Model as a worthy upgrade to my work rig. I am upgrading from my old (but trusty) Razer Blade Stealth 13″ (early 2018).
Battery bloat issues seem to be plaguing the Razer laptops that I have owned so far, and this Blade Stealth was no different. The 13″ screen was also starting to seem a little too small for my needs, although the 4K touchscreen display makes everything nice and crisp.
I could have considered other brands of laptops, but I would rather have a larger screen and still enjoy the sleek aesthetics I have come to love with Razer’s range of Blade laptops.
So, the plan was to transfer all the files from the Blade Sealth to my new rig and do a reset from a recovery disk, then ship it off back to Razer for a battery repair. I could have reset the PC using Windows 10’s “Reset this PC” feature, but somehow that did not come to mind and I decided to just create a recovery drive and do a full wipe and restore to securely wipe the drive, and thwart any chances for anyone to recover any files.
The process of resetting my PC using this method has always been fairly straightforward, but somehow that wasn’t the case this time.
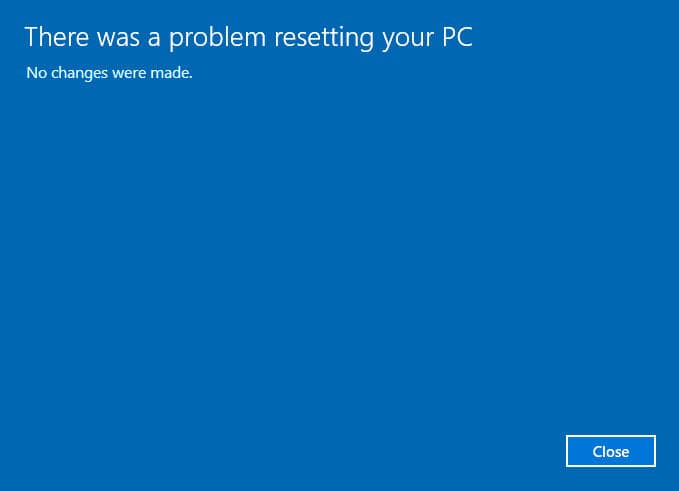
Recovery unsuccessful, but they won’t say anything more – drat!
I don’t wish for anyone to experience the same issues as I did, because it was simply frustrating.
To clarify, I have chosen to wipe the entire drive, which will do a clean (and slow) format of the boot drive, remove all partitions including the Recovery partition, leaving no chances for the next owner of the laptop to restore any data from the drive. On hindsight, this was the one decision that led to my 2 days of pain.
Microsoft is often not the best source of truth when it comes to displaying error messages. By the time this error message was displayed, the damage was already done. The entire boot drive was already clean formatted, with no way that I can restore using the Recovery menu available during boot up.
Trying to reset the PC again with the recovery disk only ends in the same error message at a very specific point.
This led me to establish some clues and facts:
- My recovery drive was created only a few hours before I did the reset, which means that the Windows image that is now on my recovery drive might contain the latest version of Windows which might not be compatible with old configuration files originally created by Razer in 2018.
- The error occurred only after the Windows partitions were formatted
- Some files were successfully copied to the partitions, but the process errored out somewhere
The Command Prompt proved to be the most useful tool here, as it allowed me to diagnose the issue.
Using the Command Prompt available within WinRE running from the recovery drive, I can find all the volumes currently attached to the system.
- Launch Command Prompt from the UI options, or you can try pressing
Shift+F10on the keyboard - Launch the disk management tool by typing
diskpartinto the console - Type
list volto see all currently attached volumes - Type
exitto quitdiskpart

You can ignore Volumes 4 and 5 in the image above. Respectively, those volumes are the recovery disk USB stick and one other external HDD I had connected to the system.
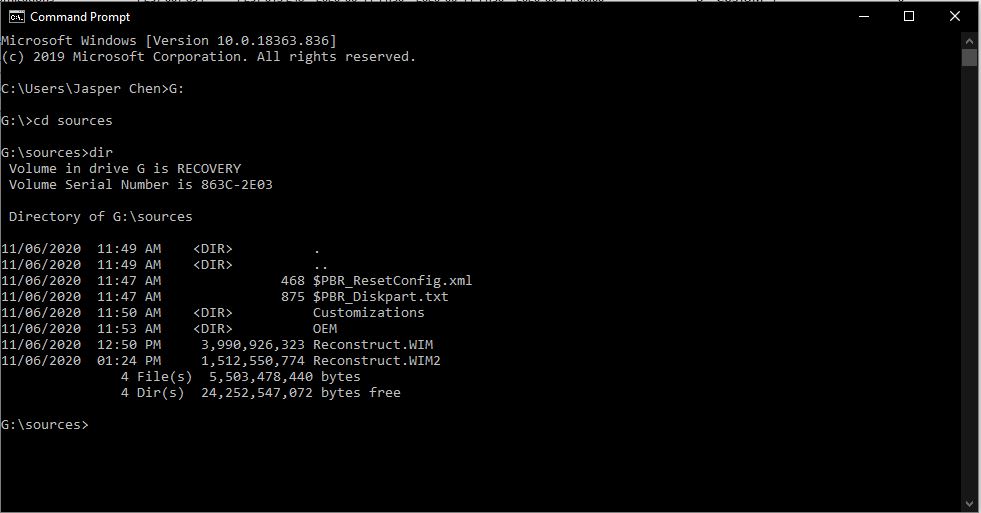
If I run dir W: or dir T: on the command prompt, I can see that these partitions are not empty. In fact, it looks like some Windows files were copied onto them until a certain point which it failed.
At this point, I need to see the error log to find out what actually failed. If you do a search on Google, most people would tell you that you can find the error log in C:\$SysReset\Logs\Setupact.log. The only problem with that is we don’t actually have any drives mounted to the C: drive letter!
So Razer have decided to create the Windows installation partition mounted to the W: drive letter when it is setting up the disk partitions during a reset. I don’t know if this is the usual practice by other PC manufacturers, but Windows will automatically mount the partition to C: when Windows boots for the first time. The $SysReset directory that we need to access is a hidden folder.
To show hidden folders when you run the dir command, you need to run W:\ /a:sh. You need to replace W: with the drive letter that your main partition is mounted on. When in doubt, this is usually the largest partition out of all the partitions you see.
I then ran more W:\$SysReset\Logs\Setupact.log and kept hitting the ↵ Enter key until I reached the critical point where I could see everything going to hell.
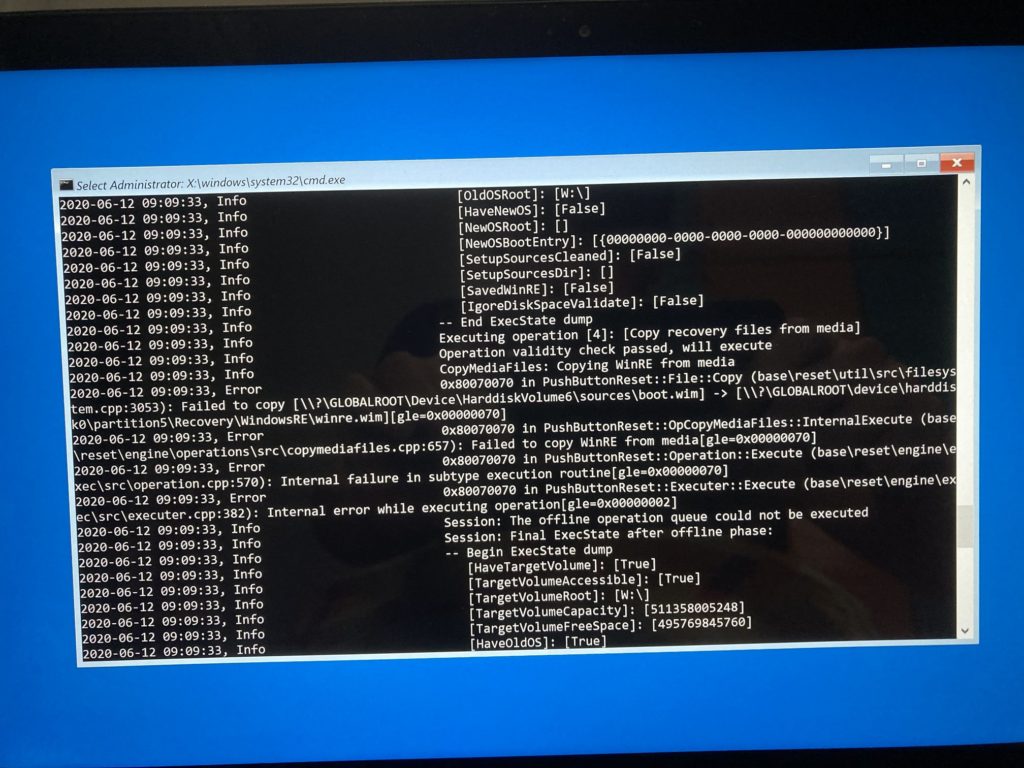
Failed to copy WinRE from media? How?
For the uninitiated, WinRE refers to the Windows Recovery Environment. This is what the Recovery partition on modern Windows PCs contain.
It seems that it was trying to copy files from \sources\boot.wim in my recovery USB stick into the WinRE recovery partition. .wim files stand for Windows Imaging Format, which is a file container format that can store drive partitions for easy distribution of Windows installations by PC manufacturers or system admins.
My first instinct was to plug my recovery drive USB into another functioning PC to see if \sources\boot.wim is even on the drive.
“It’s not there! Could that be the reason why?”, I thought to myself.
At this point, I remembered that Windows might have hidden system files from Windows Explorer. No problem, as there is one other way we can see those files.
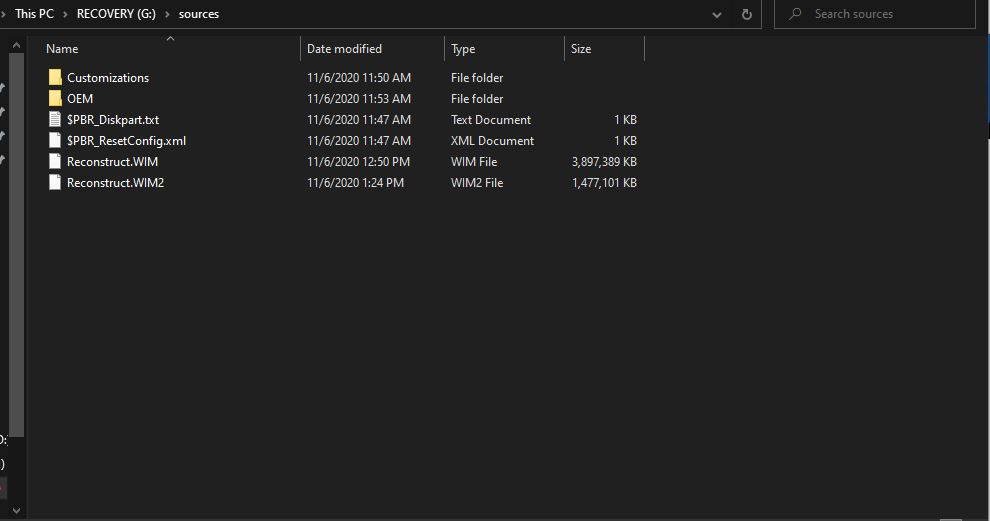
7-Zip has a feature that allows you to gain high level access to the file system. So I fired up the trusty 7-Zip File Manager and used the following steps to see if boot.wim exists:
- Enter
\\.as the directory in the directory navigation text box - Select the drive letter that is your Recovery USB. That will be
G:in my case - Double click to enter.
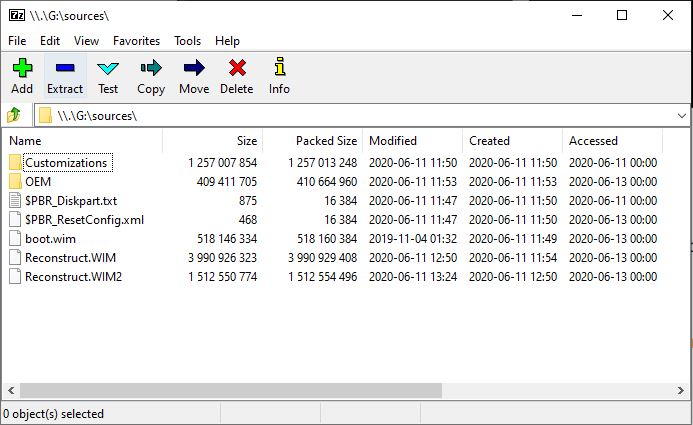
So it is there. Note that boot.wim is around ~520MB in size. What could be the problem then?
$PBR_Diskpart.txt is probably outdated
PC manufacturers make use of files like $PBR_Diskpart.txt stored in the recovery media to define how they will like to partition the main hard drive whenever the PC is reset. This configuration file, along with many other configuration files define how Windows Setup should set the system up according to the PC’s specifications in the different stages of Windows Setup.
The hardware vendor’s configuration files will usually reside in the \sources\OEM folder of the recovery drive. This is where the hardware vendor tells Windows Setup what to do.
The contents of my \sources\OEM\$PBR_Diskpart.txt are:
rem == ResetPartitions-UEFI.txt ==

convert gpt

rem == 0. RazerRecPar partition
create partition pri size=100

format quick fs=ntfs label=RazerRecPar

set id=de94bba4-06d1-4d40-a16a-bfd50179d6ac
assign letter="Q"

rem == 1. System partition =========================

create partition efi size=100

format quick fs=fat32 label="System"

assign letter="S"

rem == 2. Microsoft Reserved (MSR) partition =======

create partition msr size=16

rem == 3. Windows partition ========================

rem ==    a. Create the Windows partition ==========

create partition primary

rem ==    b. Create space for the recovery tools partition ===

shrink minimum=500

rem ==    c. Prepare the Windows partition =========

format quick fs=ntfs label="Blade Stealth"

assign letter="W"

rem == 4. Windows RE tools partition ===============

create partition primary

format quick fs=ntfs label="Winre"

assign letter="T"

set id=de94bba4-06d1-4d40-a16a-bfd50179d6ac

gpt attributes=0x8000000000000001

list volume

exit
Let’s focus on the part of the script where the Windows partition W: and the WinRE partition T: are created.
...

rem == 3. Windows partition ========================

rem ==    a. Create the Windows partition ==========

create partition primary

rem ==    b. Create space for the recovery tools partition ===

shrink minimum=500

rem ==    c. Prepare the Windows partition =========

format quick fs=ntfs label="Blade Stealth"

assign letter="W"

rem == 4. Windows RE tools partition ===============

create partition primary

format quick fs=ntfs label="Winre"

assign letter="T"

...
Ok wait… something’s off here.
It turns out that at the time of manufacture, Razer had allocated 500MB of space to be created for the recovery WinRE partition as evidenced by the shrink minimum=500 command, which shrinks the newly created Windows partition by 500MB to allow a 500MB WinRE partition to be created right after the Windows partition.
So, the boot.wim file is actually more than 500MB in size as shown in my previous screenshot of 7-Zip. Why then would Razer script the disk configuration to only allocate 500MB of formatted space for the recovery partition?
It turns out that in my case, Razer had actually packaged a WinRE image file Winre.wim to be used to restore the WinRE partition in the \sources\OEM\SIG\Winre folder, except that the image was only 334MB when packed.
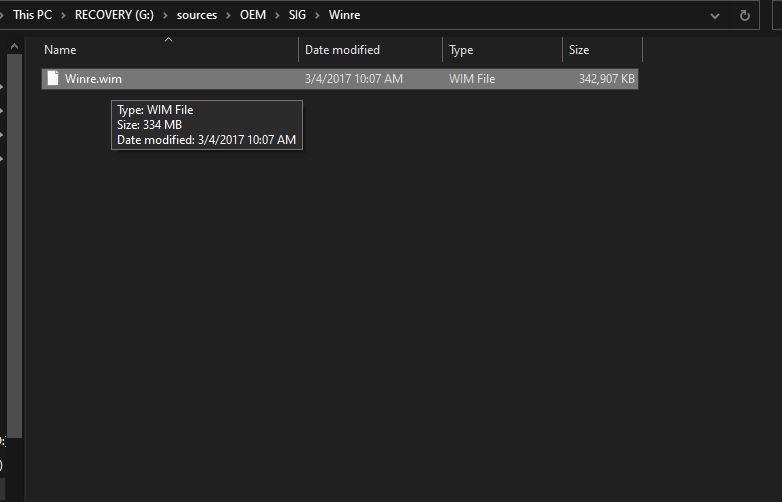
So the real problem? Windows have decided to restore a newer (and larger) WinRE image rather than using the WinRE image that Razer had originally packaged.
After numerous Windows Updates, Microsoft has decided to package an updated version of WinRE that has a larger file size to be included in newly created recovery drive media, without consideration that hardware vendors may have previously defined lesser disk space for the recovery partition in the OEM configuration files.
So what was the fix? Turns out it was really easy.
- Go to the
\sourcesfolder of the recovery drive and open$PBR_Diskpart.txtusing a text editor such as Notepad. This file is written by Windows as a fall back when the recovery drive was created - Look for the line that defines
shrink minimum=xxx.xxxwas set to846in my case. It may be different for your case. Note this number down and close the file - Open
\sources\OEM\$PBR_Diskpart.txtusing Notepad. Do note that your PC manufacturer may be chosen to name this file differently. On some PCs that I have seen, the file is namedReCreatePartition.txt, but it is generally a.txtfile that recreates system drive partitions. Look through the.txtfiles in the\sources\OEMfolder - Look for the line that defines
shrink minimum=xxxand replacexxxwith the number you have previously noted down - Save the file
Once done, I plugged the recovery USB stick into my Blade Stealth, and this time the reset went on without a hitch.
If the reset is still producing errors, you might want to consider increasing the shrink minimum=xxx size (defined in MB) until WinRE can be properly written with sufficient space in the recovery partition. Check the log file for any Failed to copy WinRE from media errors.
Such an unfortunate flaw.